What Is Paper Marbling — and Why Try It?
Paper marbling is a printmaking technique in which paint floats on a thickened liquid surface, is manipulated into patterns, and then transferred onto paper in a single pull. The result is a swirling, unrepeatable design that looks far more complex than the process actually demands. Historians trace marbling to 9th-century Japan (where it's called suminagashi) and to 15th-century Persia and Turkey (the Ottoman tradition known as ebru). By the 17th century, European bookbinders were using marbled sheets as decorative endpapers in fine books — those gorgeous swirling pages you sometimes find inside antique hardcovers.
What makes marbling so inviting today is that it scales down beautifully. You don't need a printmaking studio, expensive equipment, or any prior art experience. A shallow plastic tray, a bag of carrageenan powder, and a few colors of diluted acrylic paint are genuinely all it takes. If you're curious about other accessible creative pursuits, our guide to creative hobbies for adults maps out a broad range of options worth exploring.
What You'll Need Before You Start
Gathering materials ahead of time makes the session flow smoothly. Here's what to have on hand:
Carrageenan powder
Mixed with water to create the thickened 'size' that floats paint on the surface.
Shallow plastic or aluminum tray
Holds the size; should be slightly larger than your paper sheets.
Acrylic paint (fluid or diluted)
The pigment that creates your marbled pattern; needs to be thinned to a skim-milk consistency.
Alum (aluminum sulfate) solution
Applied to paper before marbling to help paint bond cleanly to the surface.
Eyedroppers or pipettes
Used to drop small amounts of paint onto the size in a controlled way.
Stylus, toothpick, or comb
Dragged through floating paint to create patterns like feathers, chevrons, or swirls.
Paper (90–120 lb. drawing or watercolor paper)
Heavier paper absorbs the transferred paint more cleanly than standard copy paper.
Newspaper or paper strips
Used to skim the size surface clean between pulls, removing leftover paint.
A word on paper: standard copy paper works for practice, but heavier papers (90–120 lb. drawing or watercolor paper) hold the paint more cleanly. If you want to dive deeper into paper selection for art projects, our watercolor painting beginner guide covers paper weight and absorbency in useful detail. And if you're thinking about where to set all this up, setting up a small creative workspace at home has a helpful pre-session checklist.
Step-by-Step: Your First Marbled Sheet
Follow these steps in order. The alum prep and carrageenan size both need time to work, so plan accordingly — most of your 45–90 minutes is relaxed waiting, not active effort.
Mix your carrageenan size
Dissolve 1–2 teaspoons of carrageenan powder into 1 gallon of room-temperature water. Blend thoroughly — a hand blender or whisk works well — then let the mixture rest for at least one hour (overnight is even better). The size should be slightly viscous, similar to very thin gelatin. Pour it into your tray to a depth of about 2–3 inches.
Prepare your paper with alum solution
Dissolve 2 tablespoons of alum in 1 cup of warm water. Using a wide, flat brush or a sponge, apply a thin, even coat of alum solution to one side of each sheet of paper. This is the side that will touch the size. Lay the sheets flat to dry completely — typically 30–45 minutes. Label the alum side lightly in pencil so you don't confuse it.
Thin your acrylic paint
Squeeze a small amount of acrylic paint into a cup and add water gradually, stirring until the consistency resembles skim milk. Test a drop on the size: it should spread into a circle roughly 2–3 inches in diameter. If it sinks, add more water. If it sits in a tight blob without spreading, try adding a tiny drop of dish soap or ox gall to the paint and stir.
Drop paint onto the size
Hold your eyedropper or pipette just above the surface and release drops of paint one at a time, alternating colors. Each drop will push the previous color outward, creating rings. Work quickly but deliberately — the size stays workable for many minutes, but paint can start to lose its floating quality if left too long before patterning.
Create your pattern
Use a stylus, toothpick, or comb to drag through the floating paint. Even a single slow S-curve across the whole tray produces a striking result. Work gently — aggressive stirring will muddy the colors. Experiment with straight pulls, spirals, or grid combing to see what different tools produce.
Transfer the pattern to paper
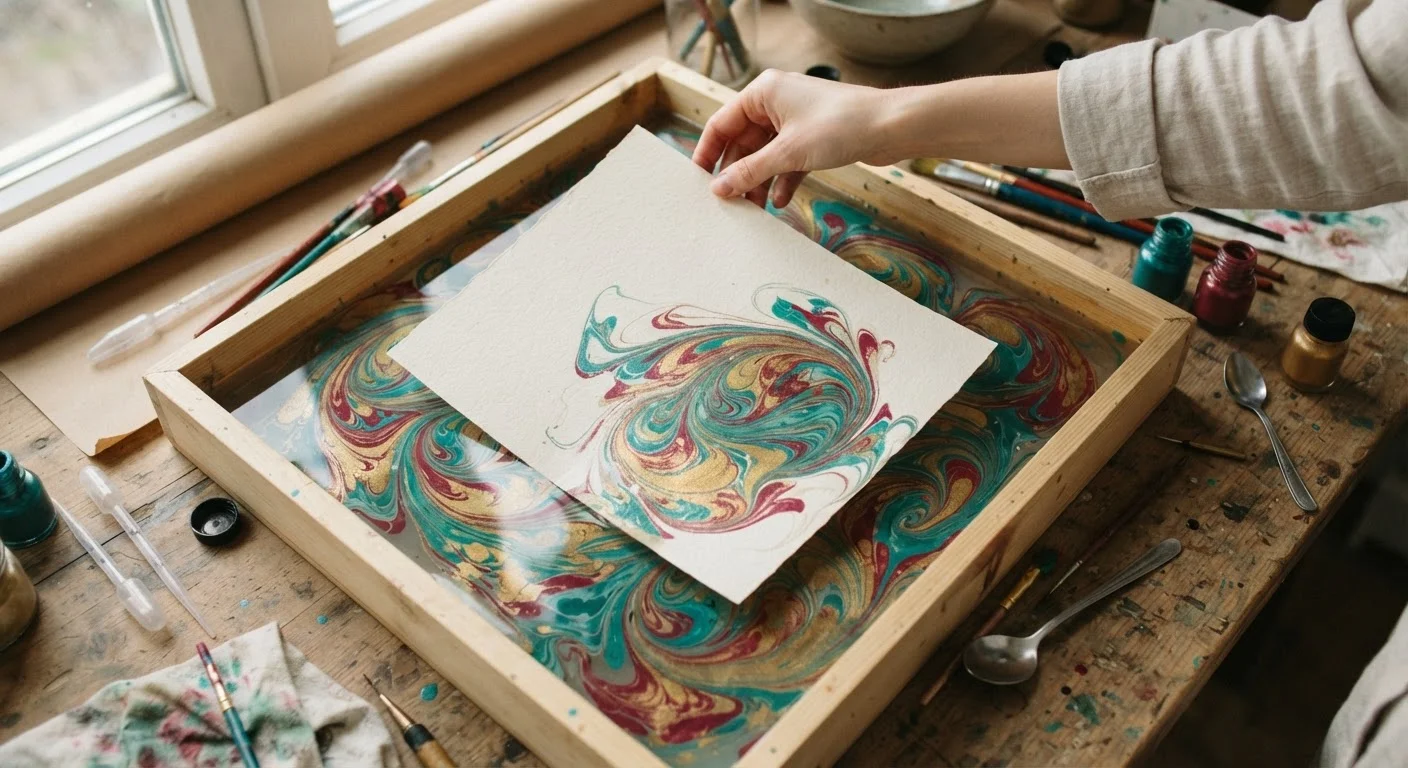
Hold your alum-treated paper by two corners, alum-side down. Starting from one edge, lower the sheet steadily onto the size — like closing a book — to avoid trapping air bubbles. Gently press the center and smooth toward the edges, then immediately lift the paper straight up. The paint will transfer with it.
Rinse, dry, and skim the tray
Hold the paper under a gentle stream of cool water, paint-side up, to rinse off excess size. Lay the sheet flat on a clean surface to dry — this takes 20–30 minutes. Meanwhile, skim the remaining paint off the size using a strip of newspaper dragged across the surface; this resets the tray for your next pull.
Pattern Ideas and Troubleshooting
Once you're comfortable with a basic drop-and-pull approach, experiment with these classic pattern moves:
- Stone pattern: Drop paint in concentric circles without any combing — the overlapping dots create a natural stone-like look.
- Nonpareil: After dropping colors, drag a wide comb across the tray in one direction, then use a fine comb perpendicular to it.
- Feather (or bouquet): After a nonpareil pass, use a stylus to draw S-curves through the pattern.
- Chevron: Run a fine comb back and forth in alternating directions to create zigzag peaks.
Common problems and fixes:
- Paint sinks instead of floating
- The acrylic is too thick. Add a few more drops of water and test again before loading the tray.
- Paint blobs don't spread
- Your size may be too thick. Mix a slightly thinner batch, or add a tiny drop of ox gall (a spreading agent available at art supply shops) to the paint.
- Paint sticks unevenly to paper
- The alum solution wasn't evenly applied, or the paper was too dry before the pull. Re-apply alum and let it dry completely.
- Design smears on transfer
- You may have pressed too hard or moved the paper during the pull. Lower the paper steadily and evenly, and lift straight up.
Marbling rewards patience and playfulness in equal measure. Unlike linocut printmaking, where a carving mistake is permanent, a marbling tray can be skimmed and reset between pulls — so there's very little risk in trying something bold.